Part 5 — Building Sections | Sheet by Sheet
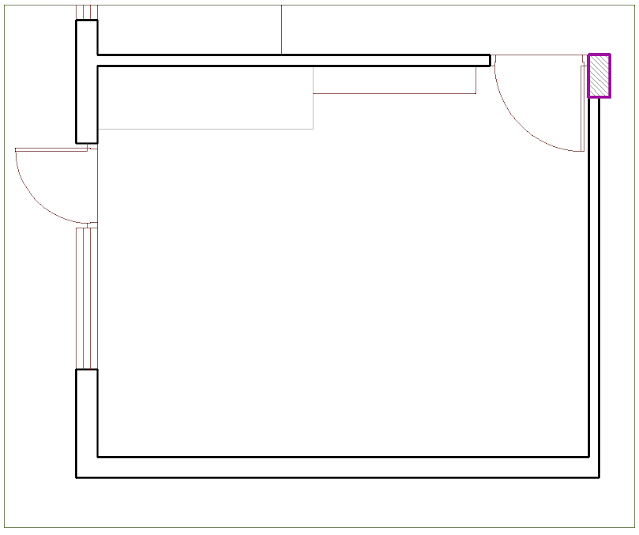
Plans show you the layout. Elevations show you the faces. But neither tells you what's happening inside the walls. That's what sections are for. A building section cuts straight through the house — vertically — and exposes everything plans and elevations leave hidden. It's the sheet that answers the questions contractors ask most: how high is that ceiling? Where does the stair land? What's the structural depth at that beam? What it shows: Interior ceiling heights — room by room Stair geometry — rise, run, headroom clearance Structural member depths — beams, headers, joists Insulation layers and wall assembly thickness Roof structure and attic conditions Floor to floor heights on multi-storey homes Relationship between indoor finished floor and outdoor grade Types of sections: Building section — cuts through the full width or length of the house. Shows the big picture — overall height, stair relationshi...


Comments
Post a Comment